How to Replace Physical Product Photography with 3D Rendering
Learn how to transition from costly physical photo shoots to an automated, photorealistic 3D rendering pipeline for ecommerce and hardware products.
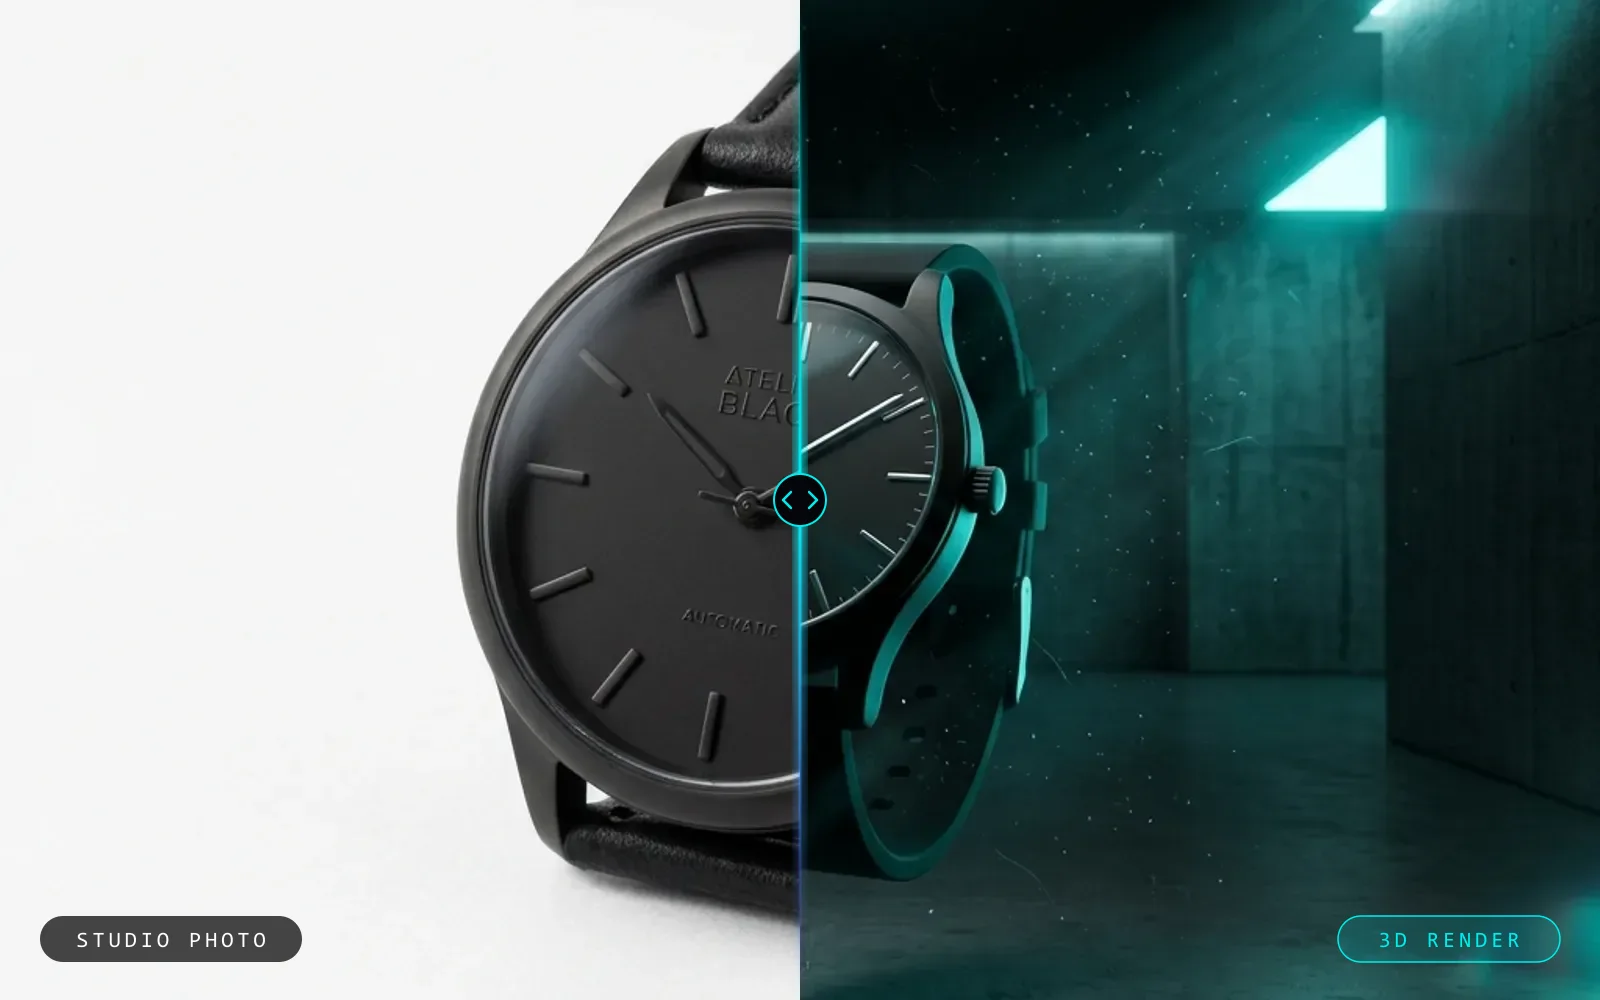
Traditional studio photography has clear limits. Shipping physical prototypes, booking studio space, hiring staging crews, and waiting for favorable lighting create bottlenecks that slow down go-to-market schedules. For modern brands, learning how to replace physical product photography with 3d rendering is the most reliable way to cut production delays, lower per-asset costs, and gain total creative control over digital storefronts.
Moving to computer-generated imagery (CGI) transforms your visual pipeline from a reactive physical shoot into a flexible, software-driven asset library. Once you build an accurate digital twin of your product, you can generate an infinite number of camera angles, lighting conditions, and material variations without ever touching a physical camera.
Why Digital Pipelines Outperform Traditional Studios
Physical product shoots introduce logistical friction at every stage. If a product label updates or a packaging dimension changes by two millimeters, an entire catalog shoot must be restaged, relit, and retouched.
A 3D rendering workflow separates the product geometry from the environment. This shift offers several structural advantages:
- Zero Logistics Overhead: You do not need to ship fragile samples across the globe or manage customs paperwork for pre-release units.
- Pre-Production Marketing: Visual assets can be generated months before manufacturing runs are finalized, enabling early presales and distributor catalogs.
- Consistent Lighting and Scale: Virtual cameras and lights can be locked to exact coordinates, guaranteeing that every SKU across thousands of web pages shares identical framing and exposure.
- Infinite Customization: Swapping colors, textures, finishes, or languages requires updating a digital shader rather than setting up another shoot.
A Step-by-Step Guide: How to Replace Physical Product Photography with 3D Rendering
Transitioning to a 3D pipeline requires a structured approach. It is not simply about replacing a photographer with a 3D artist; it is about building a repeatable production line.
1. Ingesting Source Geometry
Every render begins with geometry. The input method depends on your product type:
- CAD and Engineering Files: Tech manufacturers and industrial brands usually have files in STEP, IGES, or SolidWorks formats. These files are mathematically exact representations of the physical item.
- Polygonal Modeling: For soft goods, apparel, or organic shapes without CAD records, 3D artists build meshes from scratch using reference sheets and orthogonal diagrams.
- 3D Scanning and Photogrammetry: For handmade or vintage items, laser scanning or photogrammetry can capture the baseline shape and volume.
2. Mesh Optimization and Retopology
Manufacturing CAD models are built for production tooling, not real-time visualization or smooth rendering. They often contain internal fasteners, excessive polygon counts, and uneven surface tessellation.
Before texturing, these models must undergo retopology. This process cleans the geometry, converts raw NURBS data into clean quad-based polygon meshes, removes hidden internal parts, and unwraps the UV coordinates so textures map across the surfaces without distortion.
3. Creating Physically Based Rendering (PBR) Materials
Photorealism depends heavily on physics-based material simulation. Using Physically Based Rendering (PBR) workflows ensures that materials react to light exactly as they do in the physical world.
A typical PBR material stack includes:
- Base Color (Albedo): The pure color of the surface without embedded shadows or highlights.
- Roughness Map: A greyscale map dictating how sharp or diffuse surface reflections are, from mirror-polished chrome to matte silicone.
- Metallic Map: Defines whether a material behaves as a dielectric (plastic, wood, glass) or a conductor (steel, gold, aluminum).
- Normal and Displacement Maps: Micro-surface details like brushed metal grain, leather pores, or knurled dials that catch directional light without increasing polygon counts.
4. Setting Up Virtual Studio Lighting
In a physical studio, photographers position strobes, softboxes, and bounce cards. In 3D software, the process is identical but vastly more precise.
Production teams use High Dynamic Range Images (HDRIs) to project real-world ambient lighting data onto the digital asset. They then supplement this environment with virtual directional lights, rim lights, and scrims. Cameras in 3D suites replicate real-world focal lengths, depth of field, and optical distortion. For standard ecommerce, an 85mm to 100mm virtual lens minimizes perspective distortion, presenting your product in true proportions.
5. Automated Rendering and Variant Generation
Once the master scene is configured, automation takes over. Instead of manually shooting twenty color variations, scriptable rendering pipelines apply alternate texture sets to the model and render out multiple resolutions automatically.
Assets can be exported directly with transparent alpha channels, making integration into web templates, print layouts, and digital ad networks seamless.
Technical Nuances: Achieving Undetectable Photorealism
The primary concern when replacing traditional photography is the fear that renders will look artificial. The human eye is exceptionally good at spotting digital perfection. Real products have slight flaws, and reproducing those flaws is what makes a render believable.
- Edge Filleting: In the real world, no edge is infinitely sharp. Even razor blades have microscopic rounded profiles. Applying subtle bevels or rounded-edge shaders catches specular highlights along seams, instantly making hard surfaces look tangible.
- Surface Imperfections: Purely clean glass or plastic looks fake. Introducing microscopic dust particles, light wipe marks, and subtle roughness variations into the shader maps gives the object realistic tactile depth.
- Color Calibration (ACES Workflow): Ecommerce operations require accurate color matching to prevent high product return rates. Implementing the Academy Color Encoding System (ACES) maintains color precision from the 3D viewport through final web delivery, matching the precise Pantone codes of your manufacturing specs.
Managing Asset Workflows and Version Control
To make digital rendering sustainable at scale, treat your visual assets like software code. Establish rigid naming conventions that map digital files to internal SKUs.
Maintain a central repository for master 3D models, standard studio environments, and approved material libraries. When a brand update occurs, you only need to update the central material asset, allowing you to re-render entire product lines in hours rather than coordinating multi-week studio schedules.
Making the Transition
Replacing physical photography with 3D rendering is not an all-or-nothing move. Most brands begin by transitioning their hero products or upcoming hardware launches to 3D, creating a digital asset library before scaling the process across their full catalog.
At XEONTRIX, we build hyper-realistic 8K 3D product renders and automated visual pipelines that eliminate the friction of physical studio shoots. If you are ready to evaluate a digital pipeline for your product catalog, get in touch for a free product mockup or a 30-minute workflow consultation.
Questions people ask
What files do I need to start replacing photography with 3D renders?
You typically need manufacturing CAD files (such as STEP, IGES, or OBJ formats), technical dimension drawings, and high-resolution reference photos or Pantone codes for color and material matching.
Does 3D rendering look as realistic as real photography?
Yes. Modern Physically Based Rendering (PBR) pipelines simulate real-world light physics, surface roughness, and optical camera properties, making properly built renders visually indistinguishable from traditional studio photos.
Can 3D rendering handle transparent, reflective, or fabric products?
Yes. Advanced ray tracing and path tracing engines accurately calculate complex light phenomena such as subsurface scattering, refraction through liquids and glass, and microscopic thread weaves for textiles.
How does 3D rendering reduce ecommerce operational costs?
It removes physical shipping, studio rental, staging, and reshooting expenses. Once a 3D model is built, rendering new color variants, lighting angles, or updated labels takes minutes through automated software scripts.